Master 3D Sculpting in Blender – Zach Reinhardt
$79.00 $21.00
Description
 Master 3D Sculpting in Blender Information
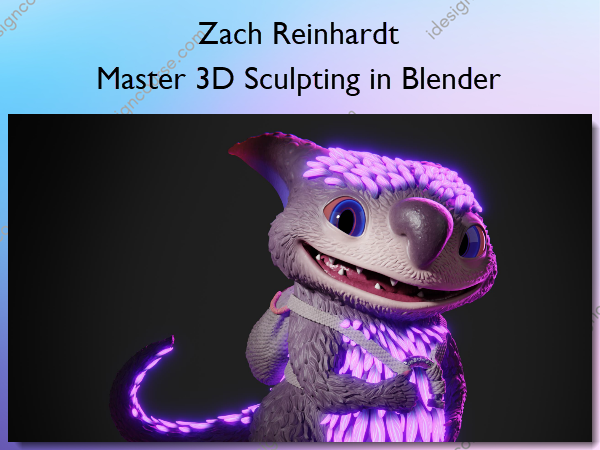
Master 3D Sculpting in Blender by Zach Reinhardt is designed to teach comprehensive 3D sculpting techniques using Blender.
Do you want to create 3D sculptures you can be proud of?
Are free Blender sculpting tutorials on YouTube only giving you a basic understanding, but they don’t teach you all the steps necessary to create stunning, high-quality sculptures?
That’s why we created this extensive Blender course, that teaches you all important sculpting workflows using only free tools.
Learn in a step by step sculpting project how to bring a cute 3D creature to life, by sculpting from references, adding color and rendering a turntable animation.
So, pick up your graphics tablet (a mouse will do too, but it’s much less fun) and start your sculpting journey.
What You’ll Learn In Master 3D Sculpting in Blender?
Part 1 – Sculpting Fundamentals
Chapter 1 & 2 – Getting Started & Fundamentals
In the first two chapters, you will make your very first steps into the sculpt mode of Blender. You will learn about all important tools and workflows, and go through simple exercises.
Chapter 3 – Base Meshes
Learn different workflows on how to create your base meshes, which are the foundation to start the sculpting process.
Part 2 – Cute Creature
Chapter 4 – Cute Creature Base Sculpting
In this chapter, we use a 2D concept drawing as reference, build a proper base mesh and start sculpting, by adding medium level details.
Chapter 5 – Cute Creature Retopology
Learn all important workflows about retopologizing your sculptings, by creating a mesh with a good topology, based on the shape of your sculpting. This retopology mesh can then be used to create high-resolution details in the following chapter.
Chapter 6 – Cute Creature Details
Learn how to sculpt high-resolution details, like the details on the head and the fur. You will also discover the cloth tools in Blender’s sculpt mode, which we will use to create a backpack.
Chapter 7 – Cute Creature Presentation
Learn all you need to know about making your sculpting look pretty. We will create a flexible clay shader that you can put on any sculpting. We will pose the create and color it with the Sculpt Vertex Colors and procedural shading methods. In the end, we will light it and render out still images and a turntable animation of the creature.
Part 3 – Epic Creature
Chapter 8 – Epic Creature Base Sculpting
Learn a creative sculpting workflow where we start with a simple sphere and then step by step build the base sculpting of the creature out of it. We will also learn how to use anatomy references to make the different body parts look more realistic.
Chapter 9 – Epic Creature Details
Learn how to add fine details to the creature using various techniques. We will use the default sculpting tools, masking techniques but also brush textures to add high resolution details like scales and skin. Additionally, you will learn how to create your own custom brush textures from 3D data and 2D photos.
Chapter 10 – Epic Creature Shading
Learn how to texture the creature from scratch. We will UV unwrap the model, bake different texture maps, texture paint the base color and add fine details to the skin in the shader editor. Additionally, we will create semi-realistic eyes for the creature.
Chapter 11 – Epic Creature Rigging
Learn how to create a fully-featured rig for the creature, to be able to easily pose and animate it. For this, we will use the free Rigify add-on, which simplifies the process a lot, by offering different rig-templates, which we can adjust to our needs. Afterward, we generate all controller bones with a single click. Additionally, we will learn how to bake all materials of the creature into simple texture maps.
Chapter 12 – Epic Creature Rendering
Learn how to create a beautiful still render of your sculpture. For this we will set up the camera, give the creature a majestic pose, create a simple environment with pre-made 3D assets, create a moody light setup and fine-tune everything in the compositor.
Chapter 13 – Epic Creature Animation
Learn how to bring your sculpted creature to life by creating a looping animation. For this we animate the camera, the environment and the creature. By adding an element of surprise to the scene, we make it more fun and engaging. Additionally, you will learn how to fine tune your render and compositing settings for faster rendering, and render out a high-quality video of your animation.
Part 4 – Brushes & Sculpting Settings
We are currently finishing up this final part of the course, which will give a detailed explanation of all the sculpting settings, tools and brushes.
More courses from the same author: Zach Reinhardt
Salepage: Master 3D Sculpting in Blender – Zach Reinhardt
Delivery Policy
When will I receive my course?
You will receive a link to download your course immediately or within 1 to 21 days. It depends on the product you buy, so please read the short description of the product carefully before making a purchase.
How is my course delivered?
We share courses through Google Drive, so once your order is complete, you'll receive an invitation to view the course in your email.
To avoid any delay in delivery, please provide a Google mail and enter your email address correctly in the Checkout Page.
In case you submit a wrong email address, please contact us to resend the course to the correct email.
How do I check status of my order?
Please log in to iDesignCourse account then go to Order Page. You will find all your orders includes number, date, status and total price.
If the status is Processing: Your course is being uploaded. Please be patient and wait for us to complete your order. If your order has multiple courses and one of them has not been updated with the download link, the status of the order is also Processing.
If the status is Completed: Your course is ready for immediate download. Click "VIEW" to view details and download the course.
Where can I find my course?
Once your order is complete, a link to download the course will automatically be sent to your email.
You can also get the download link by logging into your iDesignCourse account then going to Downloads Page.

