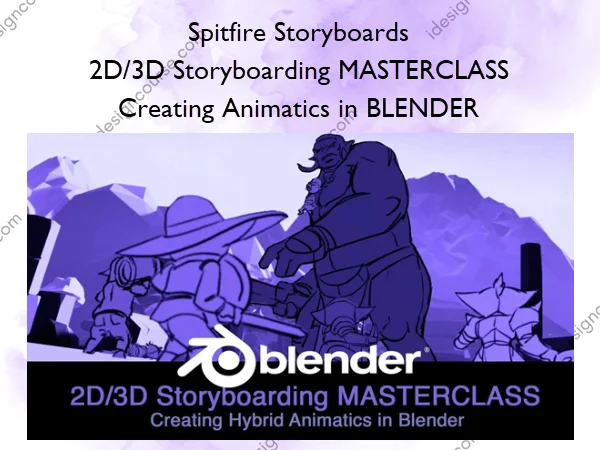
2D/3D Storyboarding MASTERCLASS – Creating Animatics in BLENDER – Spitfire Storyboards
$250.00 Original price was: $250.00.$200.00Current price is: $200.00.
⇒ Delivery: 7 days
Description
2D/3D Storyboarding MASTERCLASS – Creating Animatics in BLENDER – Spitfire Storyboards
This MASTERCLASS covers everything mentioned in this video. This here is for those of you wanting to learn not only how to use Blender, but how to use it within the fuller context of storytelling and sequence construction.
How to make that JUMP from 2D to 2D/3D . The course is designed to be welcoming for many skill levels from keen beginners to seasoned veterans who already have strong storyboarding skills but who now want to expand their storytelling toolkit with Blender.
What You’ll Learn In 2D/3D Storyboarding MASTERCLASS
MODULE 1 – Intro to Story and 2D Foundations (Beginner)
- Lesson 01 Story and Character Overview
This lesson covers the 3 Act + 6 Stage Plot Structure in relation to the Story, as well as discussing the Character designs, their personalities, abilities and dynamics. - Lesson 02 – Script Briefing and Breakdown
This simulates a professional ‘Sequence kick off / Script briefing’ where we discuss and breakdown the entire script in great detail, making important story notes, identifying Scene changes, and discussing ideas to build on. - Lesson 03 Shot and Camera Basics
Here we run through the variety of shot types in our visual arsenal and what each them is commonly used for. We also discuss camera language, the main types of camera motion and the effect and use of focal length. - Lesson 04 Thumbnails and Beatboards
Pure 2D thumbnailing and beatboarding, that broadly cover the whole script, in ‘beat’ form. These will act as our 2D foundation to keep referring back to, as we move into 3D.
MODULE 2 – Introduction to blender for storyboarding (Beginner) (ALSO SOLD AS STANDALONE MODULE)
- Lesson 05 – Blender – UI, Navigation and Main Functions
Moving into 3D now, using blender and the World File provided, we cover all of the main UI and Navigation features that are commonly used, along with some handy tips and tricks to make the process more fun and fluid. - Lesson 06 Blender – Creating Cameras and Ordering Shots
Next we explore the world file for storing views for either staging plans or potential shots and camera angles. We then create a number of cameras, discuss controls and keying motion, then ordering them on the timeline to create a short run of shots. - Lesson 07 – Blender – Expanded Camera Techniques
In this bonus lesson, we cover how to make more complex camera movements, like sweeping aerial shots, first person cameras and tracking shots, introducing camera constraints and simple rigs into the mix, for more controlled, precise motion. - Lesson 08- Blender – Grease Pencil 2D and Basics
Diving purely into the awesome Grease Pencil tool, we run through all its main features and functions from a 2D perspective. Everything from drawing, layers, materials, fills, canvas, onion skin and more. - Lesson 09 Blender – Grease Pencil 2D in 3D Space
Now we explore the Grease Pencil in its true potential – a 2D object in 3D Space. The heart of the hybrid technique. We’ll cover many examples of how the tool can be used in 3D, the different modes, and discuss some more complex examples. - Lesson 10 Blender – Export and other features
Here we go through how to export from blender in different formats, as well as some breif but handy segments on the realtime compositor, importing reference video, the different Istyles of the viewport, and volumetric atmosphere etc.
MODULE 3 – 3D Exploration and Staging (Beginner/Intermediate)
- Lesson 11 – Staging Plan
Taking a strictly birds-eye view of the world map, we explore staging in its broadest sense first, exploring paths and ideas in 2D diagram form, to help plan the path of the story through the world. - Lesson 12 Location Scouting
Next we drop down to explore the world at ground level, searching for identifiable Landmarks and staging areas for each scene in the script, using our 2D thumbnails as a starting point by trying to match them in 3D, before converting them to cameras. - Lesson 13 – The 180 Rule and Screen Direction
A fundamental, but important to discuss in detail, the more we get into 3D. Establishing Stage direction, Screen direction and the 180 degree rule. What this rule is, why it is important, what breaking the rule does, and also how you can work around it creatively, to bend it.
MODULE 4 – Developing a Scene (Intermediate)
- Lesson 14 -How to get into a scene
In this lesson we explore the many ways we can get into a scene. What will our first shot be? What tools do we have to work with? Then using that to start when building your first main scene. Includes a reference breakdown. - Lesson 15 – Blocking Characters and Cameras in 3D
Building on our Scene, we now block the characters action and cameras out in 3D space for short segment, setting up multiple angles, and evaluating this in realtime like a director on set. - Lesson 16 – 2D Drawn Character Performance (Drawover and Grease Pencil) Using our blockout as a 3D base, and do a character performance pass across it. We discuss two example scenes for this one using Grease Pencil in 3D space; another using the Drawover method (that can be done in any software), to compare the two approaches and when to use them.
MODULE 5 – Preparation for an Action Scene (Advanced)
- Lesson 17 -Action Reference Breakdown part 1 – Live Action Staging Starting to prepare for the big finale of the course here, we study an appropriate Action Scene from a movie, dissecting its anatomy, using a reverse Staging Plan to try and understand how the action and cameras are positioned in 3D space.
- Lesson 18 -Action Reference Breakdown part 2 – Animation and Specifics
Here we study other assorted references from other media, focusing on different elements we can learn from, such as Character Specific actions, Hero and Group moments. - Lesson 19- Thumbnailing an Action Scene
Applying the 3 Act structure to the climactic Action Scen in the script, we breakdown key tentpole moments and supporting actions and loosely thumbnail the entire action scene. We then choose one section of the Action to develop to completion across the remainder of the course.
MODULE 6 – Execution of an Action Scene (Advanced)
- Lesson 20 – Staging and Blocking for Action
Taking our thumbnails of our chosen section, we explore the battle arena where the action takes place for staging opportunities, translating our thumbnail ideas to 3d as a jumping off point before blocking the character and camera action out in 3D space. - Lesson 21 – Roughing Characters for Action
Confident that we have our staging and blocking solid, we can now drill down and focus entirely on roughing out the character performances for the action, focusing on specifics, bringing each characters personalties and abilities out in dynamic and dramatic ways. - Lesson 22 – Edit, Evaluate and Revise
Exporting our rough pass of the action, we aseemble all our shots or panels into an editing software, to watch and evaluate, creating a checklist of revisions we need to change, and revise those in rough before moving forward. - Lesson 23 – Clean up, Polish + Finalise
Finally, we take our rough revised section of action, and clean up the whole thing, making smart decisions about where to focus our efforts depending on the needs of the shot, adding any additional tweaks, and polish touches to finish the whole thing off as something you can proudly put in your folio.
More courses from the same author: Spitfire Storyboards
Sale Page: 2D/3D Storyboarding MASTERCLASS – Creating Animatics in BLENDER – Spitfire Storyboards
Delivery Policy
When will I receive my course?
You will receive a link to download your course immediately or within 1 to 21 days. It depends on the product you buy, so please read the short description of the product carefully before making a purchase.
How is my course delivered?
We share courses through Google Drive, so once your order is complete, you'll receive an invitation to view the course in your email.
To avoid any delay in delivery, please provide a Google mail and enter your email address correctly in the Checkout Page.
In case you submit a wrong email address, please contact us to resend the course to the correct email.
How do I check status of my order?
Please log in to iDesignCourse account then go to Order Page. You will find all your orders includes number, date, status and total price.
If the status is Processing: Your course is being uploaded. Please be patient and wait for us to complete your order. If your order has multiple courses and one of them has not been updated with the download link, the status of the order is also Processing.
If the status is Completed: Your course is ready for immediate download. Click "VIEW" to view details and download the course.
Where can I find my course?
Once your order is complete, a link to download the course will automatically be sent to your email.
You can also get the download link by logging into your iDesignCourse account then going to Downloads Page.
