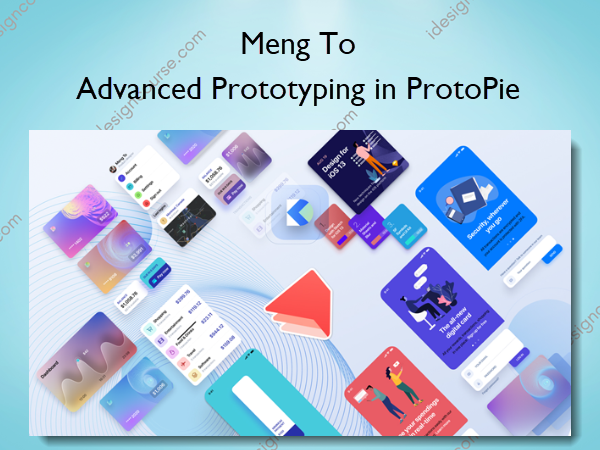
Advanced Prototyping in ProtoPie – Design+Code – Meng To
$120.00 Original price was: $120.00.$50.00Current price is: $50.00.
»Delivery: Within 7 days
Description
 Advanced Prototyping in ProtoPie Information
ProtoPie is a cross-platform prototyping tool that creates prototypes nearly as powerful as those made with code, with half of the efforts, and zero code. It’s perfect for designers who want to quickly experiment with advanced interactions using variables, conditions, sensors and more.
About this Course
In this course, we’ll learn the ins and outs of ProtoPie, from basic techniques to advanced prototyping. We’ll start the course with a solid workflow and quick prototyping techniques in order to create a working prototype that can be previewed on your device. Then, we’ll dive deep into animation techniques and complex interactions that will really elevate your design. This course isn’t just about the tool, it’s also about learning how to design an app, bringing it to life and getting tons of tips and tricks in between. As with most prototyping tools, you need to be somewhat familiar with design tools to be able to understand the core concepts of prototyping.
It’s recommended to use Sketch, but you can easily import the design files to Figma or XD.
Here’s what you’ll get:
1. INTRO TO PROTOPIE
There are plenty of techniques to learn in ProtoPie. We’ll start the whole course by understanding all its capabilities and in what context it should be used for your team. Version 4 comes with a lot of new features such as Components, Constraints and various improvements.
2. QUICK PROTOTYPING
Just like most prototyping tools, you can quickly create a quick prototype that navigates to every screen of your app, with preset screen transitions like Fade, Pop, Slide In, Slide Out and Flip. Learn the basics of ProtoPie, starting with configurations, triggers and responses. We’ll build a simple prototype with 6 screens that’s imported from Sketch.
3. START SEQUENCE ANIMATION
Crafting animations that gracefully follow in a specific order can be time-consuming. It’s also an increasingly popular technique found on many popular web and mobile apps. In this section, we’ll learn how to set up animation timing and delays to create something that delights.
4. DRAG AND RELEASE
Gestures like Drag, Pinch, Long Press and 3D Touch are easy to create in ProtoPie. You can set animations like Move, Scale and 3D Rotate that reacts nicely to those gestures.
5. TOGGLE WITH CONDITIONS
Often times, you’ll want to toggle different animation states back and forth. Conditions are perfect for that scenario and they take very little time to set up. A good example is the toggle ON/OFF that you often see in iOS and Android. Based on the X position of a layer, you can set the appropriate visual states and animations.
6. SCREEN TRANSITION
Animated transitions between screens are becoming common, especially in iOS 13. For example, the Apple App Store lets you tap a thumbnail and it will gracefully transition to a detail screen without breaking the flow. To achieve, we’ll need to properly use constraints and native Shape layers.
7. PULL TO DISMISS
Once you’re in the Detail screen, we’ll learn how to create some interesting gestures that transitions back. We’ll use Pull to detect progress of the dismiss behavior and then animate accordingly.
8. PAGE SCROLL VARIABLE
Scrolling is an important part of any app design. With the progress of that behavior along with Conditions, you can do interesting animations.
9. INPUT AND SUBMIT
Creating a Login experience with input and submit is impossible for most prototyping tools. This usually requires coding. With ProtoPie, you can easily achieve this with Conditions and Formula. Additionally, we’ll learn how to bring a GIF or Movie file to your prototype.
10. CHAIN AND DRAG 3D
ProtoPie isn’t only for mobile. You can also design for a variety of device sizes, such as iPad and MacBook. In this section, we’ll learn how to take a Drag interaction and apply a 3D rotate using Chain. Chain allows you to apply a range of values from one to another.
11. FORMULA AND DETECT
Formula lets you mix and match variables and object properties. For example, you can get the height of a Rectangle and show that number inside a Text layer. Since the Rectangle grows on drag, the number will dynamically change as you interact with it.
12. RANGE AND CARD ANIMATION
Range is like a Condition but as a Trigger. You can set a Range condition based on Y and if it fits, then it’ll trigger an animation or a Jump. This can be useful for example, when an animation is deemed over, Jump to another screen.
13. VARIABLE AND DETECT MOUSE
You can store data across your prototype by using variables. Those variables can be changed from triggers and responses. Variables can be used across all screens. This can create prototype almost as deep as those made in code.
14. SENSORS AND DEVICE TESTING
ProtoPie is the only prototyping tool that allows you to use its sensors, including the Accelerometer, proximity, 3D touch and more.
About Author

Meng To is a self-taught designer and entrepreneur known for his work in the field of UI/UX design and front-end development. He gained recognition through his book and online platform called “Design+Code,” which provides resources, tutorials, and courses on design and coding for various platforms.
Meng started his career as a designer in Montreal and later embarked on a two-year journey around the world after his US visa was denied. During his travels, he wrote the Design+Code book, which has since garnered a significant readership. The book covers topics such as UI/UX design, app development, and design tools and techniques.
Through his platform, Meng To aims to make design and coding more accessible to individuals interested in creating visually appealing and interactive user interfaces. He shares his knowledge and expertise through tutorials, articles, and courses, helping aspiring designers and developers learn and improve their skills.
Meng To has become a prominent figure in the design community, and his contributions have made a significant impact on the UI/UX design industry.
More courses from the same author: Meng To
Salepage: Advanced Prototyping in ProtoPie – Design+Code – Meng To
Delivery Policy
When will I receive my course?
You will receive a link to download your course immediately or within 1 to 21 days. It depends on the product you buy, so please read the short description of the product carefully before making a purchase.
How is my course delivered?
We share courses through Google Drive, so once your order is complete, you'll receive an invitation to view the course in your email.
To avoid any delay in delivery, please provide a Google mail and enter your email address correctly in the Checkout Page.
In case you submit a wrong email address, please contact us to resend the course to the correct email.
How do I check status of my order?
Please log in to iDesignCourse account then go to Order Page. You will find all your orders includes number, date, status and total price.
If the status is Processing: Your course is being uploaded. Please be patient and wait for us to complete your order. If your order has multiple courses and one of them has not been updated with the download link, the status of the order is also Processing.
If the status is Completed: Your course is ready for immediate download. Click "VIEW" to view details and download the course.
Where can I find my course?
Once your order is complete, a link to download the course will automatically be sent to your email.
You can also get the download link by logging into your iDesignCourse account then going to Downloads Page.
