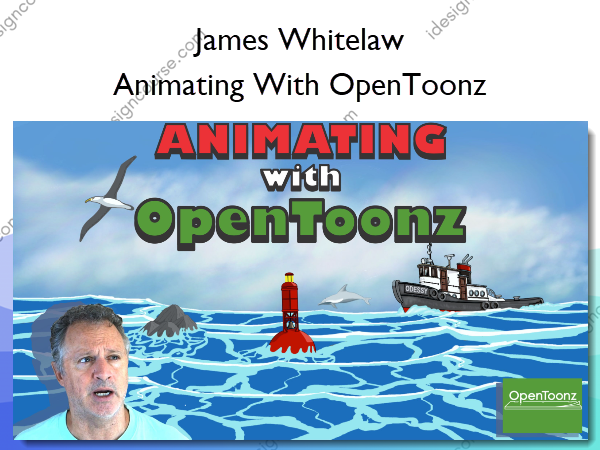
Animating With OpenToonz – James Whitelaw
$30.00 Original price was: $30.00.$15.00Current price is: $15.00.
»Delivery: Within 7 days
Description
 Animating With OpenToonz Information
Animating With OpenToonz by James Whitelaw is a detailed course aimed at guiding you through the process of creating 2D animations using OpenToonz.
I am excited to be finally offering my Animating With OpenToonz course!
Whilst the full course is still being added to and polished up, the existing material is ready and waiting for you.
This is a course I have been wanting to create ever since I started working with OpenToonz almost 4 years ago. And I am excited to finally be bringing it out in 2024.
The first parts are complete and ready for you, and the rest are currently in production and will follow really soon.
Current production will be finalised in mid 2024, around June or July. The first parts of the course (about 90% of it) are available and will get you well on your way in your journey with OpenToonz. So don’t wait for the full course, dive in now and just get going. Trust me, this stuff (animation) takes time, so don’t waste it, just get going.
Because of this “incomplete” status of the course, I am currently offering it at a discount to what the full price will eventually be when it is 100% complete. This discount is to entice you to get in now, before it is 100% complete, and save yourself some cash, later.
So if you are interested in learning how to animate with OpenToonz, then you should consider taking this course, and taking advantage of this discounted “early bird” offer.
A LOT of work is going into this course, and I think you are going to love it. So if you think you would want it (and why wouldn’t you), then please do yourself a favour and take advantage now by securing the course at this currently discounted price before it is 100% complete and goes to full price mid 2024.
It is going to be a great course, so please don’t have regrets later – secure yours whilst this discount is available – as once the course is complete this discount will forever fall away.
What You’ll Learn In Animating With OpenToonz?
Part 1 – Basics
Initially in the first part of the course, Basics, you will cover all the moving parts of the OpenToons platform. You will look at installing the latest version of OpenToonz and how to add and install correctly the FFmpeg files that are necessary to import and export MP4 video files. You will need to be able to do this (import and export MP4 video files) often in your future animation work.
Then you will look at things like the layout of the workspace, specifically the “rooms” OpenToons is organised into, and the Tool and Function bars. And you will look at what’s available in each. You will look at the Schematic & FX windows, and the Function editor, the X-sheet etc.
This will all be at an introductory level. We will dive into each in more detail later as we get to the creation parts of the course. But these introductory lessons will enable you to see what’s available in OpenToonz, and how to navigate your way around.
Ok. The creating is about to begin!
Part 2 – Scene 1
In Scene 1, you will start creating!
After looking at the various options available, you will begin creating your first drawings in OpenToonz. You will cover the various ways OpenToonz allows you to draw and create your work, looking at the different types of layers available, like vectors & rasters and some special OpenToonz formats of both of these. You will look at how to create and edit objects and lines, and fill them, paint them etc. Then you will create your first project folder, and start creating your first scene by creating drawings and assets you will come back to later in the course.
You have begun!
Once you have created some drawings and assets, you will then take a look at creating your first animation in OpenToonz. You will look at the various ways OpenToonz allows you to animate, and you will do your first Frame By Frame animation. Later on in the course you will get to Puppet or Cut-Out animation, and using Plastic and Skeletons to animate. But Frame by Frame animation is where you will start.
Relax, you will get to everything… this journey has only begun!
Part 3 – Scene 2
In the second scene of the course, you will create some more drawings and assets. Just this time they will be a little more complex and plentiful than in Scene 1. You will also look at creating some beautiful back grounds that will later be animated and come to life later on in the course. You will be introduced to a variety of ways to create the back grounds. These will be vital to this scene and the whole project working well, so you may want to spend some extra time here.
Around this point you will start to dig a bit deeper into some more advanced methods of animating that OpenToonz offers, like using Skeletons, Plastic and IK to animate. you will start to apply these methods to your creations here, and this scene will start to “come alive”.
You will now be ready to create a camera fly through that will tie the 2 scenes together into one seamless piece of eye candy animation. You will also be shown how to create multiple cameras around the 2 scenes so you can shoot the same animation from a variety of angles, distances etc. You will also learn how to use some tricks OpenToonz offers to create a 2.5D look to your scene.
Part 4 – Adding FX
Now you are ready to start to using some more of the powerful tools that are available in OpenToonz. You will look at the many filters & special effects (FX) that OpenToonz offers, like light, shadow, water, dust, mist, smoke, reflection etc – all the great tools you will soon become very accustomed to using as you dig deeper into the power and depth of OpenToonz.
Part 5 – Applying FX to Scene 1
You will start applying some of these filters and FX methods to your 2 scenes, and with your new found knowledge of these techniques, you will go back to Scene 1. Once it is all set up, you will render it all out.
Part 6 – Applying FX to Scene 2
After applying FX to Scene 1, you will move to Scene 2 and apply these methods and FX to that scene too. Once it is all set up, you will render it all out.
Part 7 – Putting it all together
There is just one last thing to do. You will need to bring these 2 scenes together, add sound, and credits, and for this you will take the rendered animation into an editing suite.
You will be introduced to the free editing software that I use, ShotCut. You may have or want to use a different editing software, such as DaVinci Resolve or Adobe After Effects etc. but we will be using ShotCut in this project.
Using ShotCut (or any other editing software) you can splice into the fly through animation a few of those extra camera shots you may have done. Or you may stick to just the single camera fly through shot, it’s all up to you.
Once the editing and compilation of all the rendered video and sound is in, the very last thing you will need to do is to render the final finished animation out so it can be viewed as a finished video.
Congratulations!! You have just created an amazing piece of animation that you can be both amazed by, that you created this, and proud of, because you created this! You can now post it on all your socials, put in your Show Reel or up on your YouTube channel.
You did this, you should be proud! Oh, and along the way, you have mastered OpenToonz.
A big achievement.
Well done!
Part 8 – Postscript of the course
Here we will look at everything we have learnt and done in this course. It is a refresher and a shortened version of everything we have covered.
Part 9 – Extra material
This section will remain “live” and will be updated from time to time for the life of this course. Which is a long, long time.
Whether it is something I have created or animated in OpenToonz, or used some FX or filter I have set up to render out some amazing effect etc – what ever I feel is appropriate to your continued growth and learning, will be posted here.
It is bonus material, not connected directly to the course, but will be of interest to you to see how I am using what I have shown you here, in my work.
And that’s it! That’s what’s in the course. I hope you have been interested into taking the course. It will be a pleasure and a privilege to have you onboard!
More courses from the same author: James Whitelaw
Delivery Policy
When will I receive my course?
You will receive a link to download your course immediately or within 1 to 21 days. It depends on the product you buy, so please read the short description of the product carefully before making a purchase.
How is my course delivered?
We share courses through Google Drive, so once your order is complete, you'll receive an invitation to view the course in your email.
To avoid any delay in delivery, please provide a Google mail and enter your email address correctly in the Checkout Page.
In case you submit a wrong email address, please contact us to resend the course to the correct email.
How do I check status of my order?
Please log in to iDesignCourse account then go to Order Page. You will find all your orders includes number, date, status and total price.
If the status is Processing: Your course is being uploaded. Please be patient and wait for us to complete your order. If your order has multiple courses and one of them has not been updated with the download link, the status of the order is also Processing.
If the status is Completed: Your course is ready for immediate download. Click "VIEW" to view details and download the course.
Where can I find my course?
Once your order is complete, a link to download the course will automatically be sent to your email.
You can also get the download link by logging into your iDesignCourse account then going to Downloads Page.
